What it does:
- Minimizes wrinkles and fine lines
- Kills acne-causing bacteria
- Fights dullness
- Relieves skin inflammations
- Boosts blood flow
Pros:
- Affordable
- Multi-tasker
- Travel-friendly
- Easy to use
- FDA-cleared
- Goggles included
Cons:
- Not comfortable for longer sessions
Price: $117
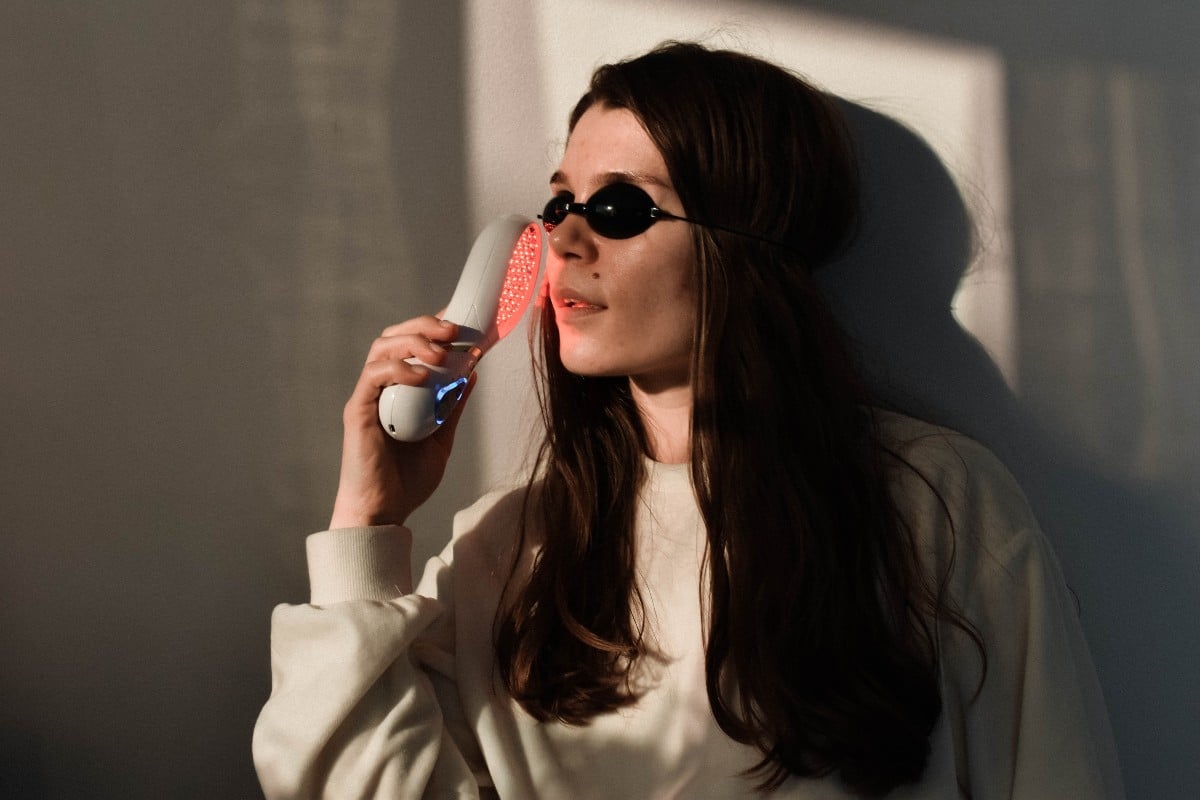
I wasn’t into facial devices until I became a skincare devotee, and honestly, trying out these foreign-looking tools is the best thing my skin has ever experienced. And since my skin is oily, prone to breakouts, and I want to dodge the apparition of my first lines, the Project E Beauty LumaGlow device seemed just perfect to try out. Here’s why: the device combines the power of blue and red LEDs, which are the pillars of lights to tackle the most common skin conditions: breakouts and wrinkles.
So I’ve used LumaGlow for almost five weeks (P.S.: I’m still using it, turned into a fan) and see the results yourself.
What is LumaGlow
Project E Beauty Luma Glow is a handy device with two easy-to-swap interchangeable heads that use noninvasive light waves to improve skin at different depths. One head utilizes 44 blue LEDs, while the other features 44 red lights. Here’s the gist: these lights penetrate the skin, whereas red LEDs go deep into the skin layers, acting on fibroblasts, which induce collagen and elastin production. Yep, that means firmer, plumper skin.
Even if the blue light doesn’t penetrate the skin as much, it can kill acne-causing bacteria, soothe inflammation and minimize redness — right what I’m struggling with as a too-oily, acne-prone skin type. Feeling intrigued? I’ve covered more about LED therapy for acne here.
The FDA approval of Project E Beauty LumaGlow was another convincing factor for me to try out the device, as it gives me a safe feeling. Aham, I’m wary like that.
Interestingly, the device features two modes. The normal mode provides constant light, while the pulse mode delivers pulsing light for more dramatic treatment. Lastly, LumaGlow has five-time settings, from 1-minute treatment to 3, 5, 12, or 120, and a built-in stop sensor that automatically ends the treatment. Plus, it comes with goggles!
How to use: easy and intuitive
As the small and lightweight device that it is, I find LumaGlow so intuitive to use, given that it only has three buttons: start/stop, timer, and mode. Before anything, I exfoliated my skin two days before starting the treatment. I’ve done it to remove dead cell buildup, so the light makes its way into the skin easier. Equally important is to have a clean, dry complexion before performing the LEDs therapy.
I chose the color — I’ve mainly used the red one because more collagen means more chances for my ice pick scars to fill up — selected the mode and the time. I started with 3 minutes for the first treatment to allow my skin to adjust to it, and for the next sessions, I continued with 12 minutes. Always goggles on before starting! As per the brand’s indications, I held the device 2cm away from my skin and slowly moved it around my face (and décolletage, I admit it!) until the treatment ended.
I did this for a month, almost every day.
Aftercare
The aftercare following LED therapy sessions is crucial. Because red lights boost blood flow in the skin, what is layered on the skin after sinks in instantly, enhancing the benefits.
What have I used? The Ordinary Alpha Arbutin 2% + HA, a serum that targets my main concerns: hyperpigmentation caused by pimples and also hydrates to plump fine lines look and balance sebum levels. Then I trap all the serum benefits with Sunday Riley C.E.O. Vitamin C Rich Hydration Cream, a moisturizer that brightens some more while boosting collagen and shielding against free radical damage.
What you use after LEDs therapy is quite a matter of personal preference, depending on your skin concerns. Retinol, vitamins C and E, hyaluronic acid, niacinamide, zinc, salicylic acid — they’re all great to smear on the skin after performing photon therapy. It just needs to be in harmony with your concerns and address your skin type. P.S.: exfoliators are a no-no 48 hours after treatment with LEDs.
Results
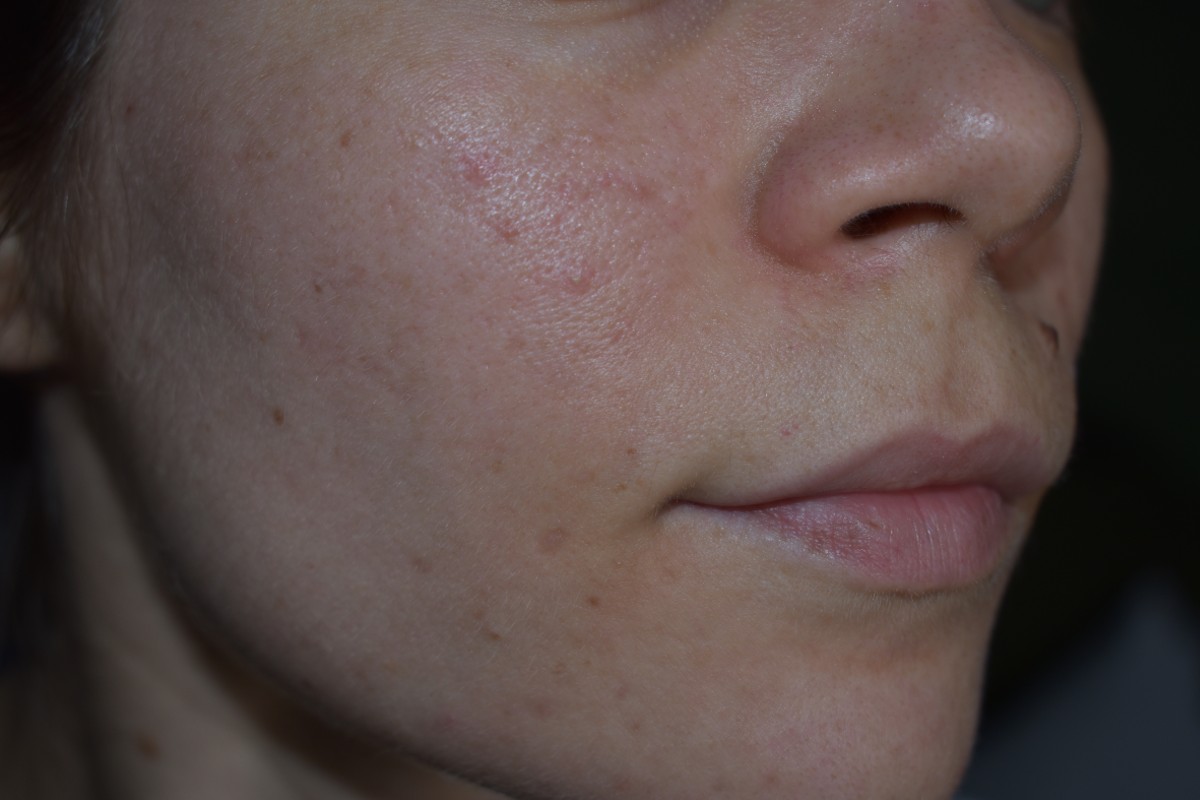
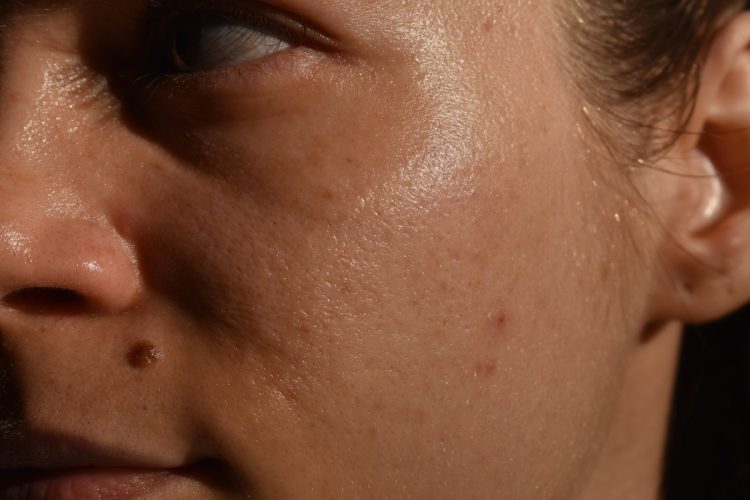
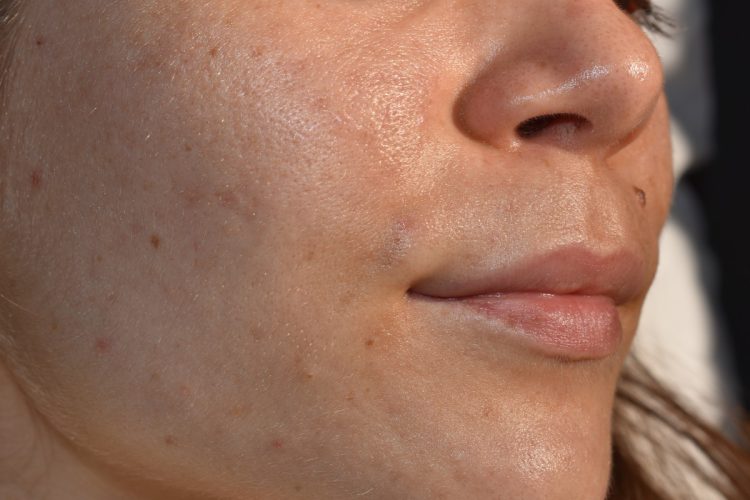
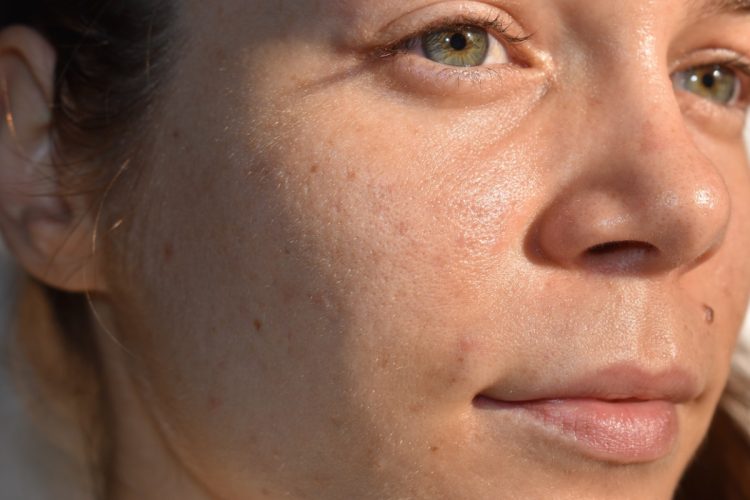
By the time the session ends, the skin feels relaxed and thirsty, rapidly quenching what I’m applying to it. The results were gradual, not dramatic, but satisfying. I’m just one-month post-treatment, and I can’t really tell my skin has changed a lot, but I definitely see improvement. What does this mean? I’ll keep using the Project E Beauty LumaGlow device to maintain and boost some more the results! In theory, the device should be used at least four days a week, and after achieving the initial goal, the frequency can be dropped down to once-twice weekly to hold on to the results.
Before
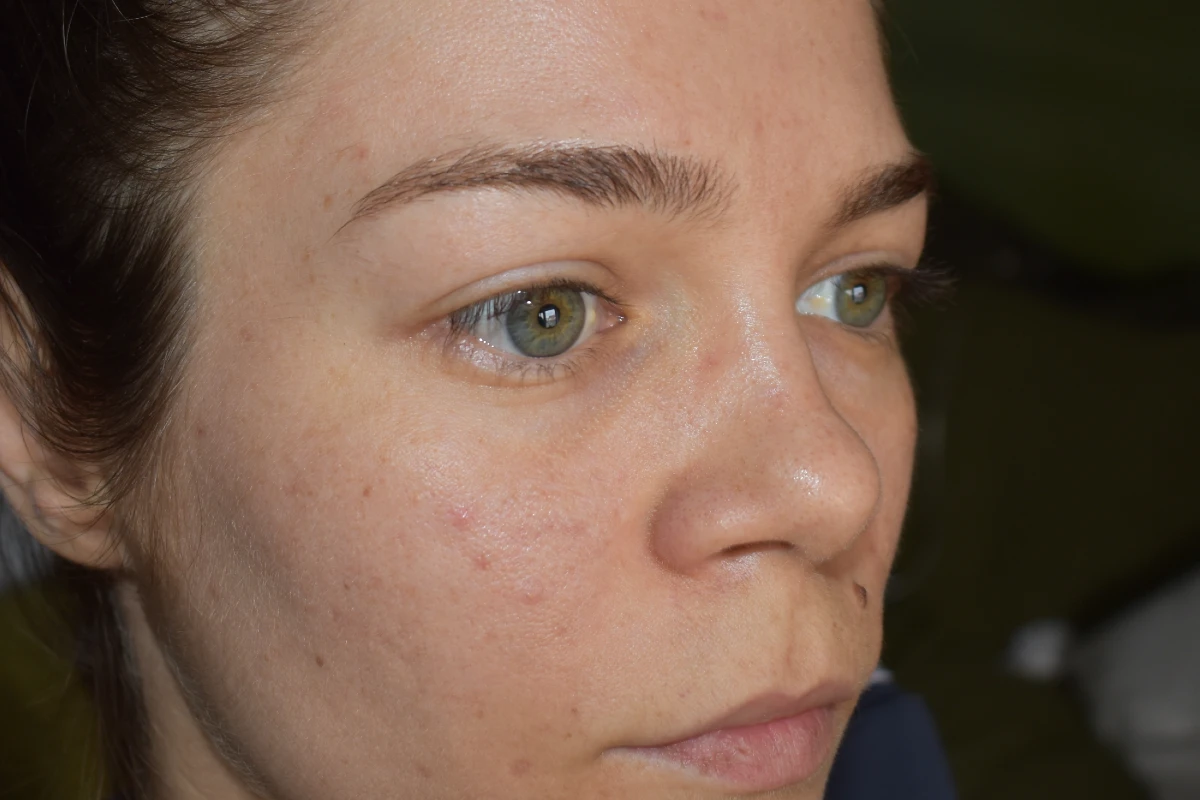
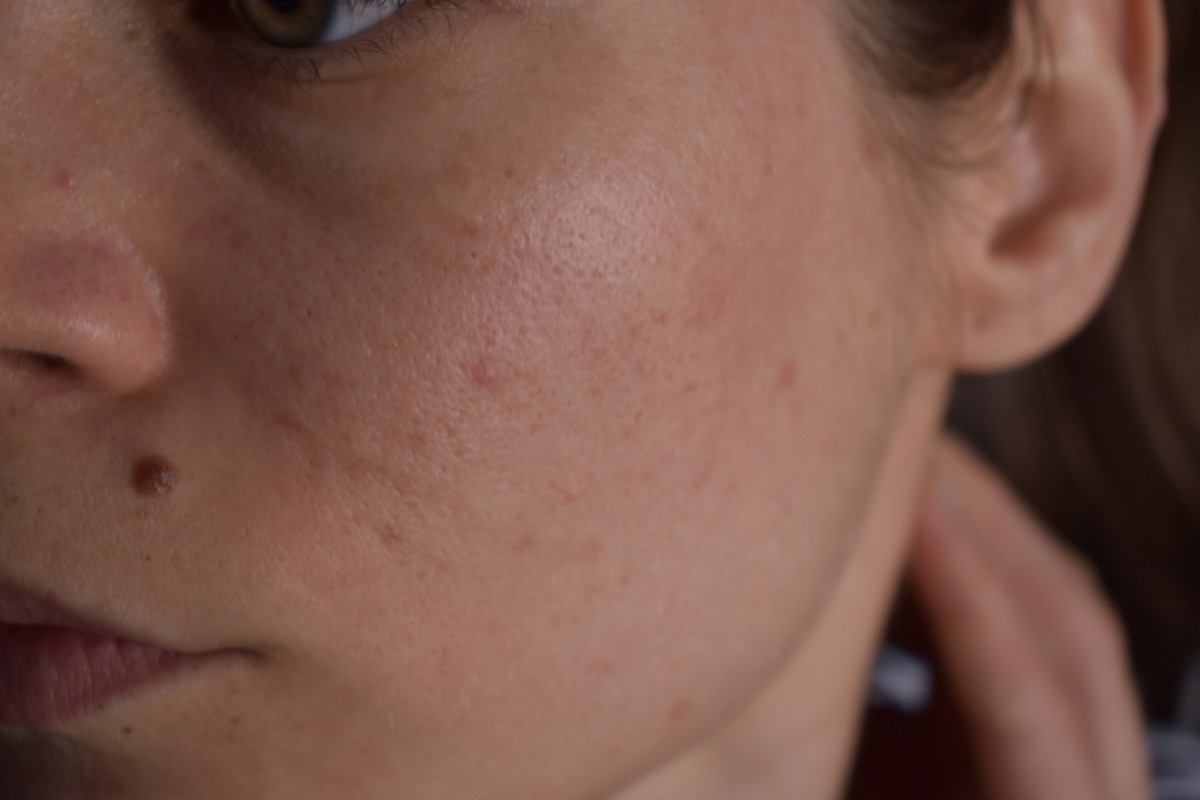
After
Takeaway
Notably, consistency is key when using LED devices, regardless of your goal. From my point of view, LumaGlow is the perfect tool to tackle my skincare concerns, and I can’t wait to see the results in the long run.